AkuSign API Documentation
Version: 1.0.0
Date: January 20, 2026
Publisher: PT. Indonesia Digital Security (IDAS)
Architecture & Workflow
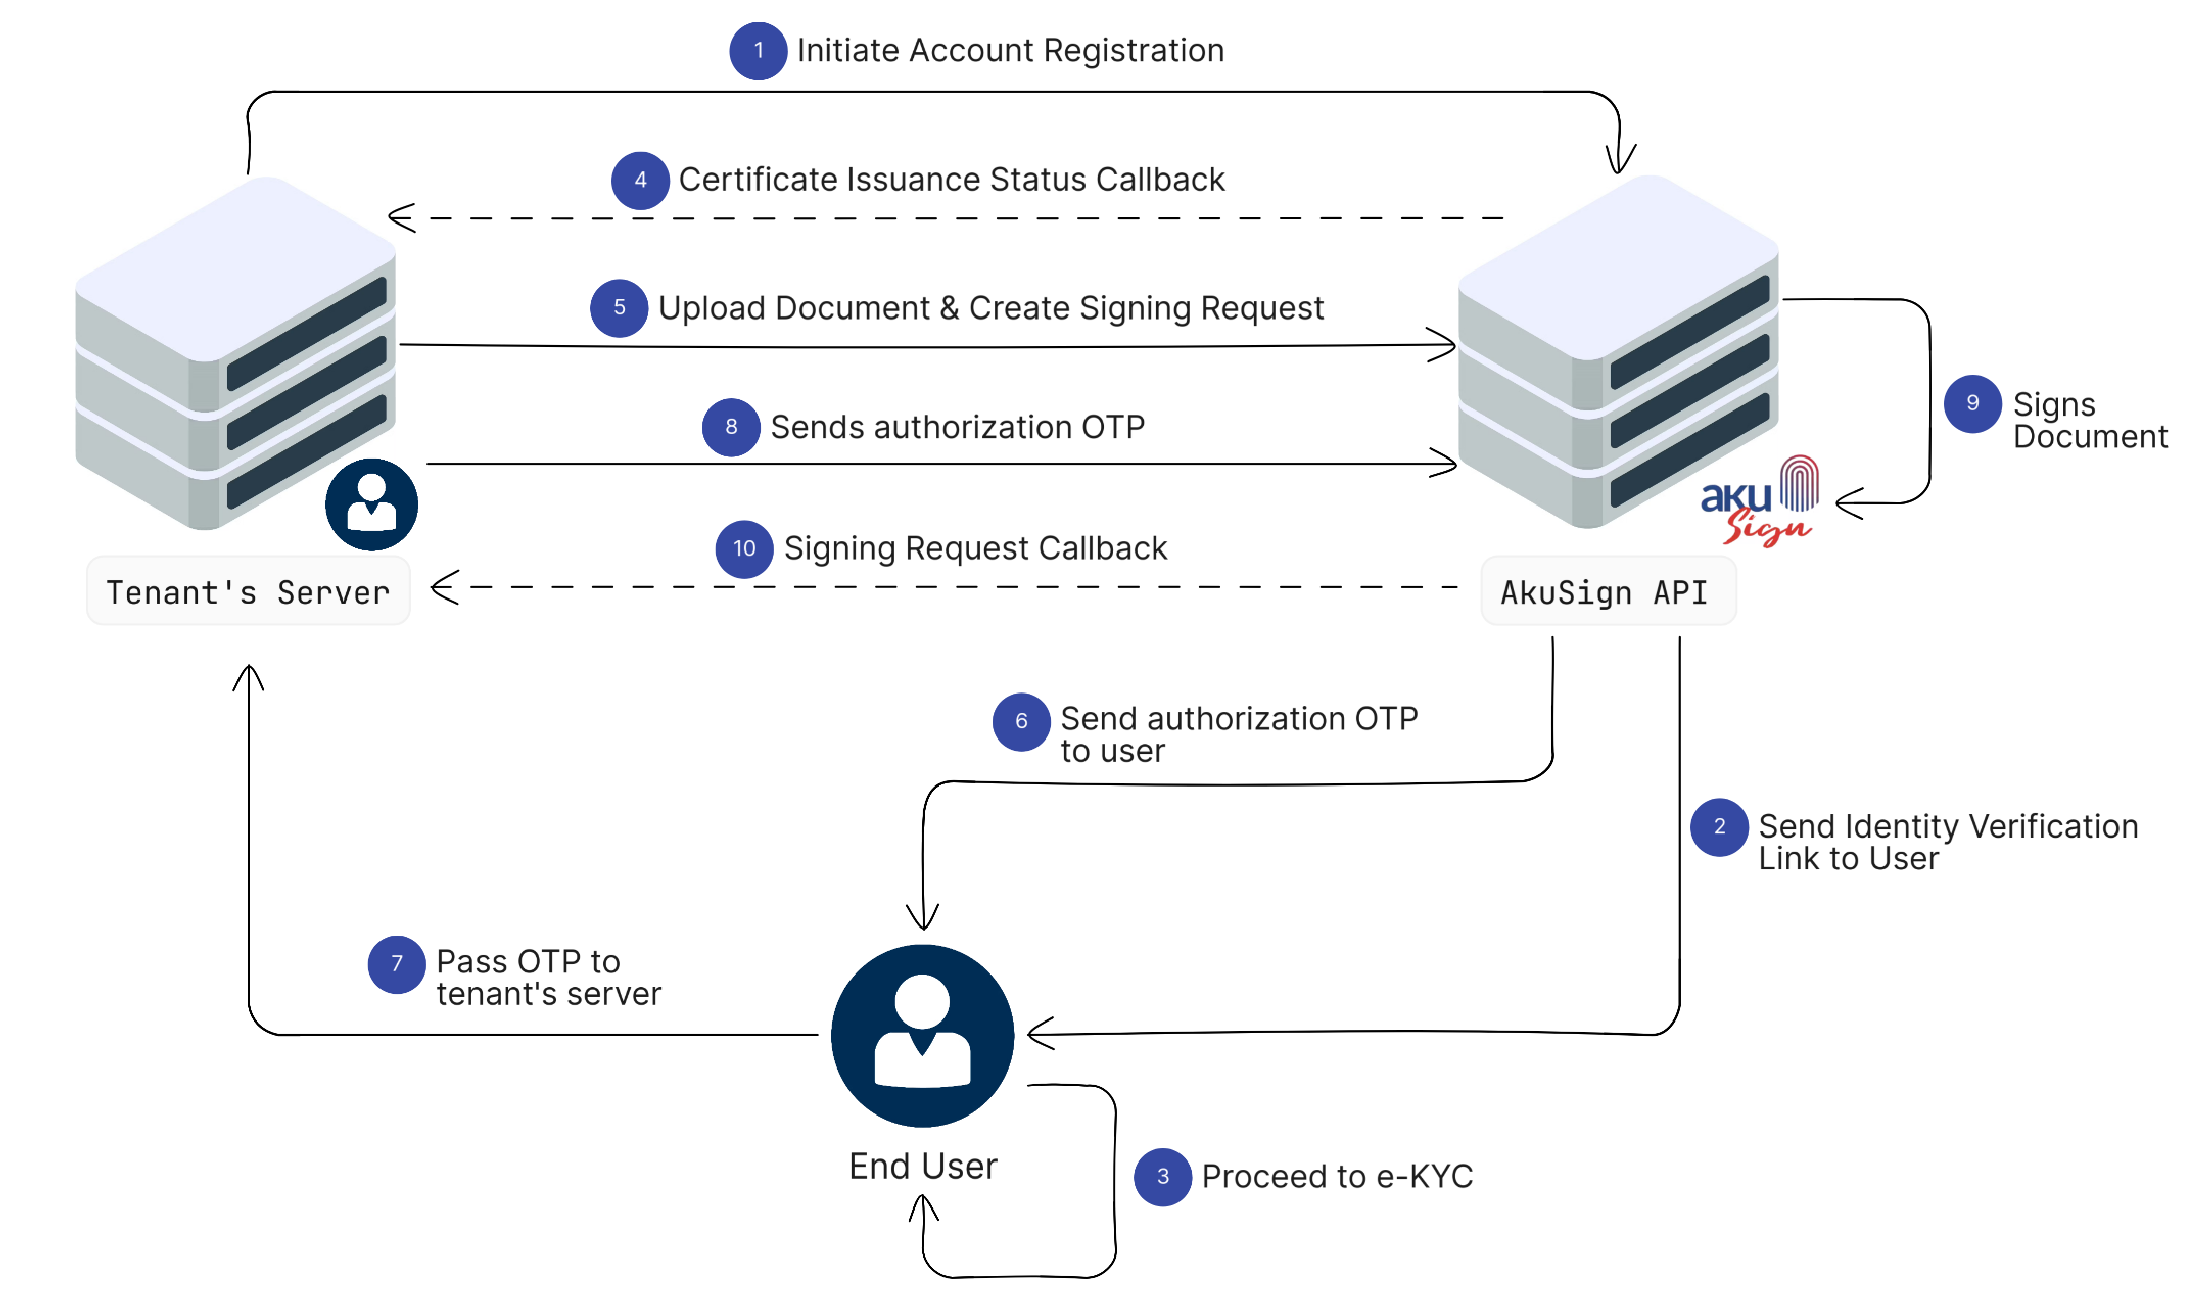
The diagram below illustrates the basic flow of how the AkuSign API works — from document upload through to downloading the signed document.
Key Steps
-
Initiate Account Registration: The tenant's server initiates the account registration process by submitting the user's information to the AkuSign API.
-
Send Identity Verification Link to User: AkuSign sends an identity verification link to the user so they can complete the identity verification process.
-
Proceed to e-KYC: The user opens the verification link and completes the electronic Know Your Customer (e-KYC) process.
-
Certificate Issuance Status Callback: After the verification process is completed, AkuSign sends a callback to the tenant's server containing the certificate issuance status.
-
Upload Document & Create Signing Request: The tenant's server uploads a document and creates a signing request through the AkuSign API.
-
Send Authorization OTP to User: AkuSign sends a One-Time Password (OTP) to the user to authorize the signing process.
-
Pass OTP to Tenant's Server: The user submits the received OTP to the tenant's system for verification.
-
Send Authorization OTP: The tenant's server forwards the OTP to AkuSign to validate the signing authorization.
-
Sign Document: AkuSign processes the request and applies the user's digital signature to the document.
-
Signing Request Callback: AkuSign sends a callback to the tenant's server notifying the result of the signing process.
Core Concepts
Before integrating with the AkuSign API, it's important to understand how the system models documents and signing. Misunderstanding these relationships is one of the most common sources of integration confusion. We recommend you to read Core Concept section first.